If you’re about to have new windows fitted in your home, it’s important to know what to expect when your installers arrive. Our uPVC Window Installation Guide is for curious customers interested in the process…
At Premier Roof Systems, we have designed, manufactured, supplied and installed all kinds of high-performance glazing systems for both residential and commercial properties.
From roof lanterns to standard replacement windows, the most fundamental aspect of any window system is how well it’s fitted. It’s no good having the latest technological advances built into a unit if it’s not fitted properly!
So if you’re interested in the process behind fitting replacement windows, our uPVC installation guide is here to make sure you’re prepared beforehand, and that you understand the process as it takes place in your home.
Remember, this isn’t a guide that will give you all the skills necessary to install uPVC windows yourself — you’ll need proper accreditation to do that — but it will give you all the information you need so that you can understand the process while your home renovation work is being carried out.
What Equipment Is Usually Used to Install uPVC Windows?
Although the finer points may be different according to the installer and the specific product you are having fitted — not to mention the state of the property and the shape of the space that the window needs to fit into — this is a fairly comprehensive list of all of the equipment you should expect a window installer to carry with them:
- Hammer
- Chisel
- Crowbar
- Hammer drill, along with an assortment of different sized drill bits
- Saw
- Knife
- Screwdriver
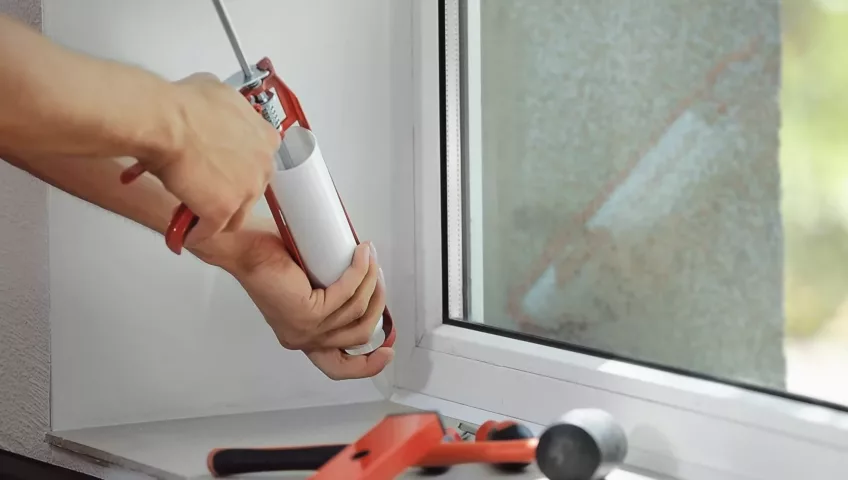
- Silicone sealant gun
- Heavy-duty tape measure
- Spirit level
- Pencil
- Hard-wearing safety gloves
- Safety glasses
For any window installer, a spirit level — and the ability to use it correctly — is absolutely key. Making sure everything is level is of paramount importance when it comes to the installation of your uPVC windows.
Before Installation: Preparation
Your installer may have to do some of these checks, but when you get a quote for the work that needs doing, it is typical for a surveyor to be employed to check:
- If any lintels are required above any windows — uPVC frames are not designed to be load-bearing, so additional structural work may need to be done prior to removing and replacing windows
- That the style of the window matches the order
- That the window sizes are correct — sometimes, despite all the best intentions, orders are put through in error. It’s important that your installer checks the size of your old windows and compares them to the new ones before even removing them from their van. Old windows shouldn’t be removed before it’s clear that the new windows will fit
- That the space around the windows is clear — both inside and out. Clear routes to access points are also needed.
Removing the Old Windows
Your window installer will remove the old windows in your house one by one. Larger windows may require more than one technician being present at a time, but an experienced fitter will be able to remove smaller windows on their own.
Dustsheets should be laid down on the inside and outside of the window being removed before work begins.
It’s likely that a knife or chisel will be used to break the plaster seal around the edges of the window frame. A saw will also be employed to cut through the frames to get them into a position where they can be removed.
Although this will be a loud process, and there’s the very real potential of glazing cracking to allow frames to be removed, accredited window fitters will always ensure that plaster and brickwork face minimal damage throughout.
Installation of the New uPVC Window Frames
Once the old window is removed and the edges of the opening are cleared of any loose plaster or similar materials, the new frames can be put in place.
Protective tape will likely be used to prevent any damage to the space around the new window.
When a windowsill is required, this will be put in place first. Finer adjustments may need to be made, so don’t be surprised to see your installer using a saw for this. As with the frames, a combination of large screws and silicone sealant will be used to secure the windowsill in place. If your installer has had to saw the sill down to size, they will have to glue new end caps to each side to ensure a neat finish.
At this point, you’ll start to see your installer paying more and more attention to their spirit level. They will work to ensure the frame fits snugly to the windowsill upstand and silicone bead. This should be perfectly vertical and very tight against the plaster line in the opening in your house.
Packing material made from plastic will also be wedged between the frame and the plaster to ensure it’s in the correct position. This requires a careful balance — there is a fine line between over and underpacking. If your installer overpacks this area, they risk bending the frame, while if they underpack, the window will not be secure.
Before the window is glazed — when the glass is installed — your installer will visually inspect the area, paying due diligence to their spirit level. Sometimes, a house may have been built on a tilt — this is often the case with older properties due to settling. Of course, it may well just be that the surroundings play tricks on the eye.
Installing the Glass
Before installing the glass, your installer will pack “glazing bridges” into the frame recess. This will ensure that the glass sits correctly in the frame. Silicone will also be used to secure the packing ready for the glass to be inserted.
The glass sealed unit will then be pushed into place as square as possible. In the event that the glazing doesn’t sit perfectly square, more packing may be used to make minor adjustments.
Your window installer will do a number of tests to ensure that any moving mechanisms are able to travel freely in place. Sash windows will require further inspection for similar reasons — for example, there should be no detectable bends to the sashes.
The final step will be for your installer to apply silicone to the edges of the frame and plaster to act as a sealer. This often takes at least an hour to properly dry, so keep your fingers away from the edges — even after your installers have finished the job, packed up and left. If any of the glass looks marked, you can also expect them to give the window a quick clean before the job is completed.
If you’re looking to replace any or all of the windows in your home, why not request a free quote? You can upload photos of your property and receive an accurate quote in less than 24 hours!
3 Comments
I conceive you have mentioned some very interesting details, thankyou for the post.
Is toughened glass fitted as standard?
Toughened glass is a safety feature and is therefore only supplied / installed as and when required.
Write a Comment
Latest News
Recent Comments
Categories
Tag Cloud
Archives